You can’t open the file on the File Explorer or access files on the device if your external hard drive or other storage device becomes RAW. The RAW disk error is a typical disk error on a computer’s hard drive, an external hard drive, a USB flash drive, or an SD memory card. Fortunately, not all hope is lost. Changing the file system from RAW to NTFS is a simple solution to resolve the RAW drive problem.
What Is the RAW File System?
A RAW file system refers to an unknown file system a hard drive or other storage device has that can’t be recognized by Windows operating system. When a hard drive, USB flash drive, or partition becomes RAW, it may have one of the following symptoms:
- The file system of the drive is unknown to your computer’s operating system.
- There is a message that prompts you to need to format the disk in drive E: before you can use it, or D:\ is not accessible because the volume doesn’t contain a recognized file system.
- The used space and free space in the RAW drive Properties is shown as 0 bytes. Besides, no file system exists in this drive.
- Your hard drive’s or partition’s file system is corrupted.
How Can You Switch from RAW to NTFS Easily?
Method 1: Use iBoysoft Data Recovery Program to Convert RAW To NTFS
Suppose your hard drive’s file system has become RAW due to a virus, faulty operation, file system corruption, or more. In that case, using iBoysoft Data Recovery for Windows can help you conduct RAW drive repair and RAW to NTFS conversion.
Step 1: On your Windows PC, download, install, and run iBoysoft data recovery software.
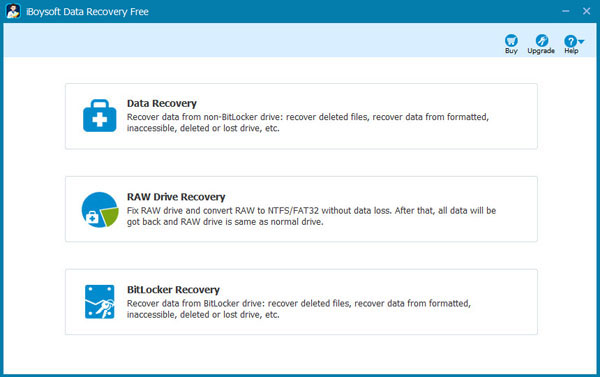
Step2: Select the “RAW Drive Recovery” option from the open software interface.

Step 3: Select your RAW drive from listed drives and click Next to implement data scan.
Step 4: Preview and check the files you’ve located. If certain files are not presented after scanning, use the Deep scan option provided by Data Recovery module to locate them.
Step 5: Click “Fix Drive” to implement RAW to NTFS conversion without losing data.
Note: The premise of RAW to NTFS conversion conducted by iBoysoft Data Recovery for Windows is that your original drive is an NTFS-formatted drive, but it becomes RAW for one reason or another.
Method 2: Use Disk Management to Convert RAW To NTFS
- To begin, right-click on This PC/My Computer and select Manage from the drop-down menu.
- After that, go to Computer Management Option for Disk Management.
- Now you must locate and right-click on the RAW drive.
- Choose the Format option from the drop-down menu, set the NTFS as your file system, allocate the unit size, and then click OK.
- After that, the RAW drive will be converted to NTFS, allowing you to access your data once more.
Method 3: Conduct RAW to NTFS Conversion Using the CMD Command Prompt
- To begin the procedure, follow the steps below.
- Click the Start menu, type cmd in the search box, and then press the Enter button.
- Then, in the CMD window, type format F: /fs:ntfs and press the Enter key. Note that F refers to your RAW storage device’s drive letter.
- The RAW drive is then converted to the NTFS file system.
Conclusion
It can be disconcerting to see RAW drive indicators on your device. But fear not, there are numerous methods for converting a RAW drive to the NTFS file system. Just like the solutions mentioned in this article, use iBoysoft data recovery program, Disk Management, or the CMD command prompt to convert RAW to NTFS. Finally, we strongly advise you to make backups of vital files to avoid a variety of data loss issues such as RAW drive, deletion, formatting, and so on.
